Smoothing Brush
Previous  Top  Next


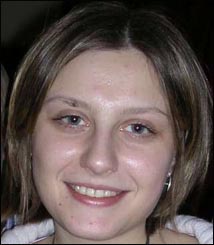
The Smoothing brush lets you clean skin to make it smoother; soften flash reflection on the face providing a matte, velvety finish; smooth wrinkles and erase minor skin defects such as spots, blemishes, pores, birthmarks etc. Besides, you can use it to whiten the teeth to achieve a more glamorous look.

Before

After
smooth before


arrow
smooth after


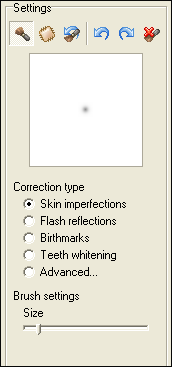
The Correction Type radio buttons let you choose a preset with optimal settings
for each particular case (brush parameters are predefined for each correction type). In all modes (correction types) you can specify the brush size. In the Advanced mode you can set the brush parameters manually to achieve the best results.

smoothing brush settings

Presets

·Skin imperfections  
Use this correction type to get a smoother and cleaner complexion, smooth wrinkles and hide minor skin defects such as spots, blemishes, pores etc.  
Paint by clicking or clicking and dragging over the area you want to correct. Release the mouse button to start a new stroke.  

·Flash reflections  
Use this correction type to provide a matte, velvety finish where the skin looks too shiny because of the flash or natural skin properties.  
Paint by clicking or clicking and dragging over the area you want to correct. Release the mouse button to start a new stroke.  

·Birthmarks  
Use this correction type to correct birthmarks or other dark small-sized defects.  
Select a brush size slightly larger than the defect, place the brush over it and click once.  

·Teeth whitening  
Use this mode to whiten the teeth to achieve a more glamorous look.  
Paint by clicking or clicking and dragging over the area you want to correct. Release the mouse button to start a new stroke.  

Advanced mode

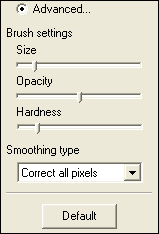
In the Advanced mode you can adjust the brush size, opacity and hardness manually, as well as select the smoothing type:

advanced mode

smoothing type

Opacity specifies the degree to which the applied coverage is transparent / opaque. The higher the opacity, the less the original image shows through.

Hardness
determines if the edges of the brush are hard or faded / soft. If you need a precise edge between the smoothed area and the rest of the image, select a hard brush. If you want it to fade at the edges, use a softer brush.

By selecting the Smoothing type you can smooth all pixels; correct only light or dark pixels; or choose a preset optimal for teeth whitening.

The Default button returns all parameter settings to their default values.

How to use the Smoothing Brush:

·Select correction type.  
·Specify the brush size, opacity and hardness where available.  
·Paint by clicking or clicking and dragging the cursor over the area you want to correct. Release the mouse button to start a new stroke.  


© 2005-2006 VicMan Software. All rights reserved.